Panorama180 Render : Tips : Drop only shadows on the ground
Developer : ft-lab (Yutaka Yoshisaka).
03/27/2019 - 03/27/2019.
This document used the google translation.
Overview
It has been confirmed with Unity 2018.3.8.
Specify VR180 panorama as background and drop only the shadow on the ground when placing 3D shapes.
This process needs to set the "Rendering Path" to "Forward".
Also, I used "Dynamic Shadow Projector"(
https://nyahoon.com/products/dynamic-shadow-projector ) Asset as a process to drop the shadow.
Procedure of use
Attach the VR180 Photo to the background and place the cylinder.
At this time, I cast a shadow on the ground.
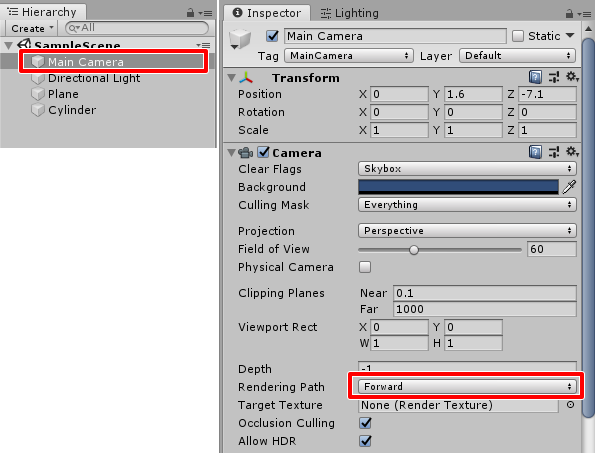
Set Camera Rendering Path to Forward
Display the Camera Inspector and set "Rendering Path" to Forward.
Prepare Shader to draw only Depth
Describe "drawDepthOnly.shader" as a Shader that draws only the depth as follows.
// This can be used when the Camera Rendering Path is Forward.
Shader "Custom/drawDepthOnly"
{
	Properties
	{
		_Color ("Color", Color) = (1,1,1,1)
		_MainTex ("Albedo (RGB)", 2D) = "white" {}
		_Glossiness ("Smoothness", Range(0,1)) = 0.5
		_Metallic ("Metallic", Range(0,1)) = 0.0
	}
	SubShader
	{
		Tags { "RenderType"="opaque" "Queue"="geometry" }
		LOD 200
		ZWrite On       // Allow writing of depth
		ColorMask 0     // Do not use RGBA

		CGPROGRAM
		#pragma surface surf Standard fullforwardshadows
		#pragma target 3.0

		sampler2D _MainTex;

		struct Input
		{
			float2 uv_MainTex;
		};

		half _Glossiness;
		half _Metallic;
		fixed4 _Color;

		void surf (Input IN, inout SurfaceOutputStandard o)
		{
			fixed4 c = tex2D (_MainTex, IN.uv_MainTex) * _Color;
			o.Albedo = c.rgb;
			o.Metallic = _Metallic;
			o.Smoothness = _Glossiness;
			o.Alpha = c.a;
		}
		ENDCG
	}
	FallBack "Diffuse"
}
Create a material that draws only the depth
Create a new Material in the Project window and assign "Custom/drawDepthOnly" in Shader.
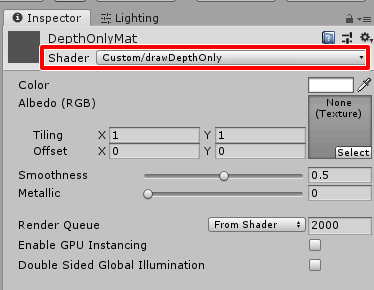
The Material name is "DepthOnlyMat".
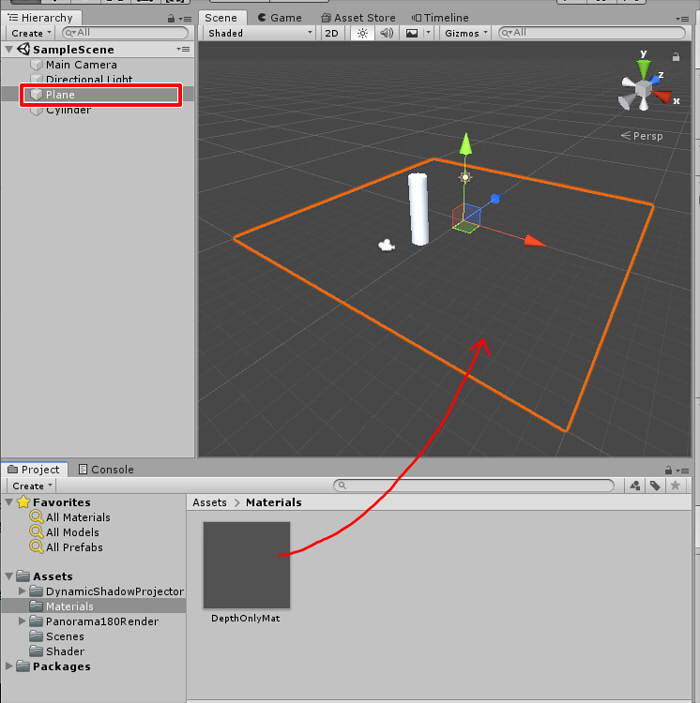
Place the cylindrical shape and the ground(plane)
Place a 3D-shaped cylinder in the scene.
Also, place "Plane" as a ground to receive shadows.
At this time, assign "DepthOnlyMat" created earlier as Material of shape Plane of the ground.
In this state, the cylinder will be drawn but the ground Plane will not be drawn.
The shadow has not fallen yet here.
Turn Plane's "Cast Shadows" Off
In the Plane's Inspector window, set Mesh Renderer's "Cast Shadows" to Off.

With this operation, the plane will not cast shadows on other shapes.
Import "Dynamic Shadow Projector" into the project
Import "
Dynamic Shadow Projector" from the Unity Asset Store into the scene.
The following is the procedure of "Dynamic Shadow Projector".
Create Shadow Projector
Place a Game Object with "Create Empty" in the scene. The name has been changed to "Shadow Projector".
Search and add "Draw Target Object" as Component of "Shadow Projector".
"Projector/Shadow Texture Renderer/Draw Target Object" has been added.

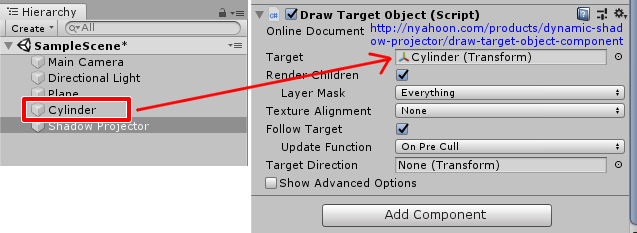
Assign a shape to cast shadows to "Shadow Projector"
Drag the shape to drop the shadow (here, Cylinder) and drop it on Shadow Projector's "Draw Target Object" Component's "Target".
If you want to drop a multi-shaped shadows on the ground, put it in Empty GameObject and assign it to "Target".
Create Material for Shadow Map
Create a material and rename it "Shadow Projector".
Assign "DynamicShadowProjector/Projector/Dynamic/MipmappedShadow" as a material shader.
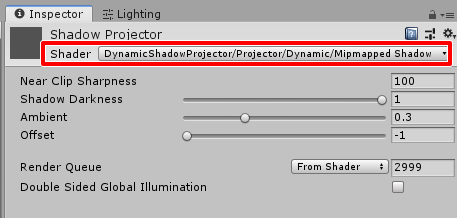
Adjust the depth of shadow etc with Inspector of "Shadow Projector".
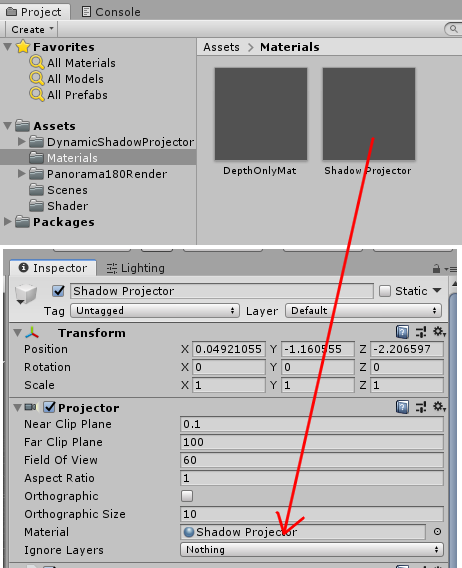
Assign material to "Shadow Projector"
Assign the "Shadow Projector" material created earlier to "Material" of "Projector" of "Shadow Projector".
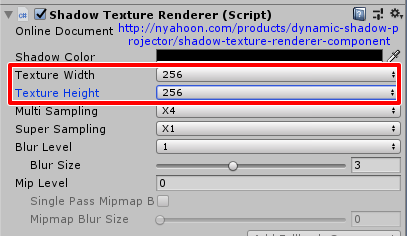
Specify shadow map texture size
Adjust the shadow texture size in "Shadow Texture Renderer" of "Shadow Projector".
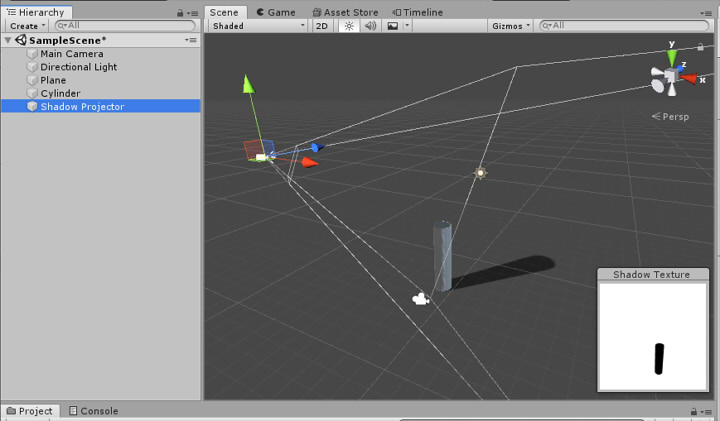
Move/rotate "Shadow Projector" and place shadows
Move/rotate "Shadow Projector" and arrange it so that the shadow falls.
Same direction as Directional Light is better.
Adjust the parameters of "Shadow Projector"
In the above condition, the shadow is also falling on the cylinder part.
These adjustments can be made in "Projector" of "Shadow Projector".
Make "Near Clip Plane" larger and leave "Far Clip Plane" the minimum distance to cast a shadow.
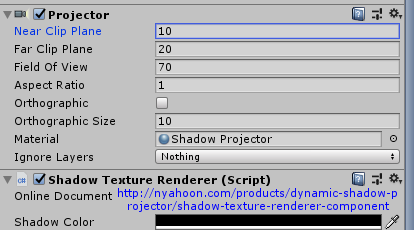
Also, I set "Field Of View" to 70.
When the "Orthographic" check box is on, the shadow will be a parallel projection.
With the above operations, the shadow has fallen to the ground.
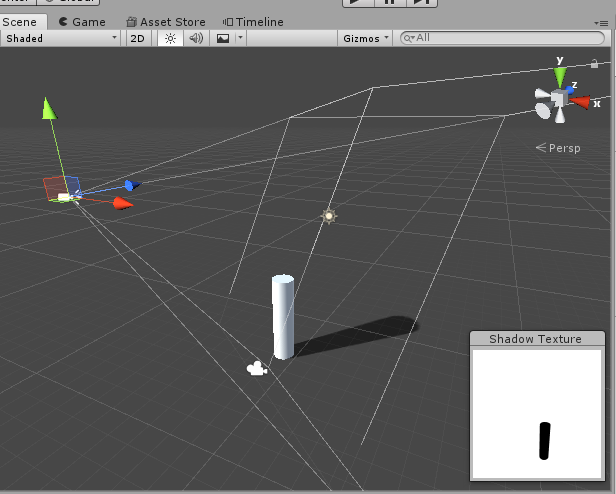
The shadow specification is now complete.
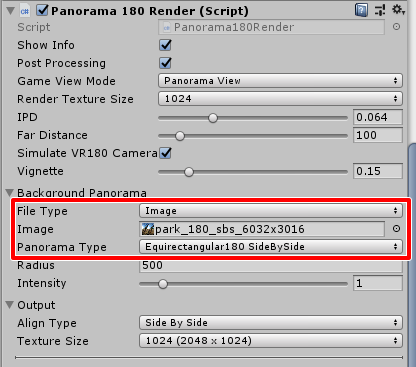
Assign "Panorama180 Render" to MainCamera
Assign "Panorama180 Render".
Assign "Panorama180 Render" to MainCamera, and assign VR180 photo to the background.
Adjust the height of MainCamera
In the Transform of MainCamera, Y of Position specifies the height from the ground in the VR180 photo actually taken.
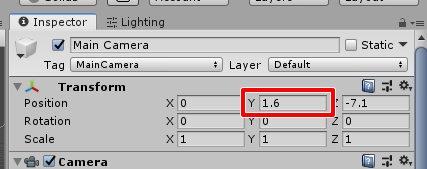
By this adjustment, by placing the plane receiving the shadow at the position of Y=0 properly, the consistency at the time of stereoscopic vision is taken.
If there is a sense of incongruity in stereoscopic vision with the output Panorama180 3D image or video, please check the height of this camera.
Play
When it is Play, it is output as follows.
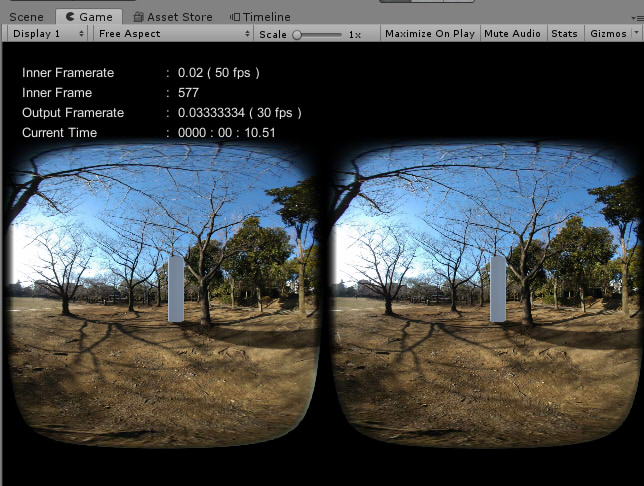
The shadow of the cylinder falls in the place equivalent to the ground.