Panorama180 Render : ランタイム用のデモ

Developer : ft-lab (Yutaka Yoshisaka).
06/13/2021 - 06/16/2021.

戻る

ランタイム用のデモ

Panorama180 Render ver.2.0.0で追加されたランタイム機能向けのデモシーンの説明です。
"Panorama180Render/Demo/Scenes/Runtime"フォルダに、Runtimeで動作するデモシーンを配置しています。

VRでの動作確認は「Oculus Integration v.29.0」を使用しました。

「PC-VR」はUnity Editor上でのPC-VR実行、ビルドしてPC-VRとしての実行になります。
Oculus Quest2 + Oculus Linkで動作確認しました。
「Oculus Quest2(Native)」は、AndroidとしてビルドしOculus Quest2でネイティブ実装して動作確認しました。

すべてのデモで、メインカメラのコンポーネントとしてPanorama180Renderを追加しています。

これはGameObjectを選択したときのInspectorウィンドウで「Add Component」ボタンを押して、[Scripts]-[Panorama180Render]-[Panorama180Render]より追加します。

VR(Oculus Integration使用時)では、"OVRPlayerController/OVRCameraRig/TrackingSpace/CenterEyeAnchor"のGameObjectに Panorama180Renderを追加します。


ランタイム用のAPIの使い方については「スクリプトからAPIを使用 (Runtime)」もご参照ください。

blocks

Unity EditorRuntimePC-VROculus Quest2(Native)
oo--

概要

実行すると、右上にパノラマ展開されたRenderTextureを表示します。
パノラマ180-3Dとパノラマ360-3Dを切り替えてキャプチャするデモです。


このサンプルは、Panorama180 Renderのパノラマ作成のキャプチャを「Panorama180Render.BeginCapture()」で開始します。
指定のRenderTextureに常にパノラマを表示します。

操作方法

キーボードの[A][S][D][W]またはゲームパッドのスティックで移動します。
キーボードの[C]またはゲームパッドの[X]を押すことで、キャプチャのOn/Offを切り替えます。
キャプチャをOffにするとパノラマのためのカメラを非表示にして、キャプチャ自身を行いません。
キーボードの[V]またはゲームパッドの[Y]を押すことで、 キャプチャを行うカメラの回転要素のXZを考慮します(Synchronize Gaze Direction : On)。
これをOffにするとカメラのY回転のみを考慮します。このとき、XZ回転は常にゼロになります。


キーボードの[B]またはゲームパッドの[B]を押すことで、 パノラマ180-3Dとパノラマ360-3Dを切り替えます。


プログラムの説明

任意のGameObjectに"Panorama180Render/Demo/Scripts/Runtime/Sample_Capture.cs"のスクリプトを割り当てます。
コンポーネントからは[Scripts]-[Panorama180RenderSample]-[Sample_Capture]で追加します。
以下のように、メインカメラ上に割り当てられたPanorama180Renderコンポーネントを取得しています。
using Panorama180Render = Panorama180Render.Panorama180Render; ... if (Camera.main != null) { GameObject g = Camera.main.gameObject; if (g != null) { m_panorama180Render = g.GetComponent<Panorama180Render>(); } }
「using Panorama180Render = Panorama180Render.Panorama180Render;」により、Panorama180Renderにアクセスしやすくしています。
以下の指定で、Start()内でPanorama180 Renderの各種パラメータを指定しています。
// Set GameViewMode (Default view). m_panorama180Render.SetGameViewMode(Panorama180Render.GameViewMode.Default); // Set IPD(Interpupillary distance. unit m). m_panorama180Render.SetIPD(0.064f); // Set texture size as Cubemap (512/1024/2048/4096). m_panorama180Render.SetRenderTextureSize(1024); // Post Processing On / Off. m_panorama180Render.SetPostProcessing(true); // Output resolution at Panorama180. m_panorama180Render.SetOutputTextureSizeType(Panorama180Render.OutputTextureSizeType._1024); // Output resolution at Panorama360. m_panorama180Render.SetOutputTextureSizeType360(Panorama180Render.OutputTextureSizeType360._2048);
各APIの使い方については「スクリプトからAPIを使用 (Runtime)」をご参照くださいませ。

「Panorama180Render.BeginCapture();」を呼ぶことで、パノラマ展開用のカメラを有効にします。
「Panorama180Render.EndCapture();」でパノラマ展開用のカメラを無効にします。
この「BeginCapture()」から「EndCapture()」の間では、常にカメラからのパノラマ展開処理が行われます。

OnGUI内でパノラマ展開されたRenderTextureを「Panorama180Render.GetRenderTexture()」で取得しています。
// Get RenderTexture while capturing. if (m_panorama180Render.IsCapture()) { // Get RenderTexture. RenderTexture rc = m_panorama180Render.GetRenderTexture(); }
ここで取得されたRenderTextureは「BeginCapture()」から「EndCapture()」の間で常に同一のものが取得されます。
1フレームごとに複数カメラからパノラマ展開のテクスチャを作成しRenderTextureを更新するため、負荷が高いです。

blocks_assignRenderTexture

Unity EditorRuntimePC-VROculus Quest2(Native)
ooo-

概要

実行すると、ブロック上に取得したパノラマのRenderTextureを割り当てます。
カメラからのパノラマ360-3Dを常に表示します。


「blocks」のデモシーンはOnGUIにパノラマ展開したRenderTextureを表示していました。
このデモシーン「blocks_assignRenderTexture」では、シーン内のMeshに対してUnlitのマテリアルに対してRenderTextureを割り当てています。

操作方法

キーボードの[A][S][D][W]またはゲームパッドのスティックで移動します。

プログラムの説明

任意のGameObjectに"Panorama180Render/Demo/Scripts/Runtime/Sample_CaptureRenderTexture.cs"のスクリプトを割り当てます。
コンポーネントからは[Scripts]-[Panorama180RenderSample]-[Sample_CaptureRenderTexture]で追加します。
デモシーン「blocks」とほとんど同じ指定になります。
Update()内で以下のようにRenderTextureを取得してマテリアルのテクスチャに反映しています。
RenderTexture rt = m_panorama180Render.GetRenderTexture(); if (rt != null) { if (m_mat.mainTexture == null) { #if !UNITY_2019_OR_NEWER m_mat.SetTexture("_UnlitColorMap", rt); // HDRP/Unlit m_mat.SetTexture("_BaseColorMap", rt); // HDRP/Lit #endif m_mat.mainTexture = rt; } }
1フレームごとに複数カメラからパノラマ展開のテクスチャを作成しRenderTextureを更新するため、負荷が高いです。

PC-VRでの動作も確認しました。
また、「Panorama180Render.SetRenderTextureSize()」「Panorama180Render.SetOutputTextureSizeType()」「Panorama180Render.SetOutputTextureSizeType360()」でのテクスチャサイズの指定では、 解像度を上げすぎると時間がかかります。
Oculus Quest2でのネイティブ実行では、重すぎて実用的ではありませんでした。

blocks_sync_RenderTexture

Unity EditorRuntimePC-VROculus Quest2(Native)
oooo

概要

実行すると、ブロック上に何もない白い面が2箇所表示されています。


キーボードの[C]またはゲームパッドの[X]ボタンを押すと、パノラマ180-3Dのキャプチャを表示します。
VRの場合は、Oculus Questの[X]ボタンを押すと、パノラマ180-3Dのキャプチャを表示します。


パノラマのカラーテクスチャ/DepthテクスチャをRenderTextureとして取得するデモになります。
キャプチャを行った瞬間以外はPanorama180 Renderの処理は行われません。 負荷がかかるのはキャプチャを行う数フレームの間、となります。

操作方法

キーボードの[A][S][D][W]またはゲームパッドのスティックで移動します。
キーボードの[C]またはゲームパッドの[X]ボタンを押すと、パノラマ180-3Dのキャプチャを表示します。
VRの場合は、Oculus Questの[X]ボタンを押すと、パノラマ180-3Dのキャプチャを表示します。

プログラムの説明

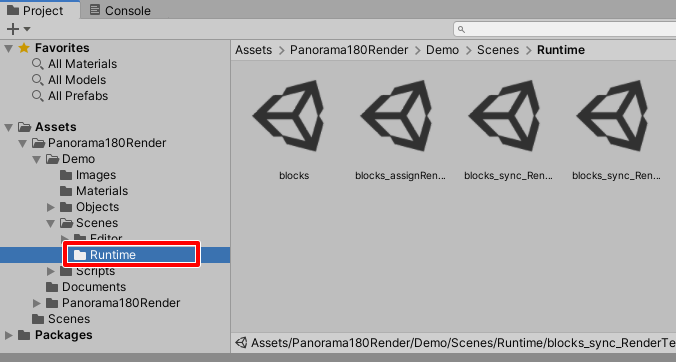
任意のGameObjectに"Panorama180Render/Demo/Scripts/Runtime/Sample_CaptureSyncRenderTexture.cs"のスクリプトを割り当てます。
コンポーネントからは[Scripts]-[Panorama180RenderSample]-[Sample_CaptureSyncRenderTexture]で追加します。

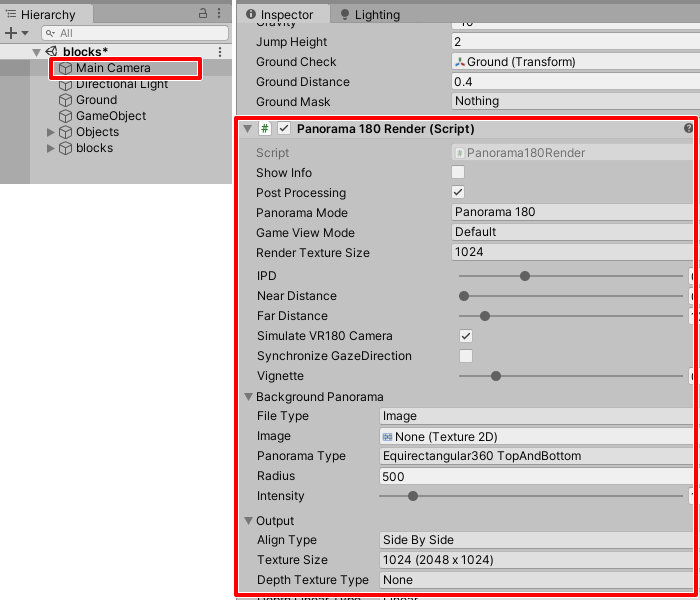
Start()内でDepthテクスチャを取得する指定を行いました。
// Set depth texture type. m_panorama180Render.SetDepthTextureType(Panorama180Render.OutputDepthTextureType.DepthDefault); // Set depth texture linear. m_panorama180Render.SetDepthLinearType(Panorama180Render.OutputDepthLinearType.Linear);
また、Depthの奥方向の範囲を狭くして、Depthの濃淡が分かりやすくなるようにしました。
m_panorama180Render.SetCameraNearFarDistance(0.1f, 10.0f);
Nearクリップ面までの距離を0.1、Farクリップ面までの距離を10.0としています。

このサンプルでは「Panorama180Render.BeginCapture()」を呼んでいません。
この後にコルーチンを使用して、同期を取りながらパノラマ展開されたRenderTextureを1回だけ取得します。

コルーチンは以下のように記載しています。
IEnumerator GetPanoramaRenderTextureCo () { if (m_panorama180Render == null) yield return null; // Call coroutine. var fc = m_panorama180Render.GetRenderTextureCo(); var curCoroutine = StartCoroutine(fc); // Wait coroutine. yield return curCoroutine; // Get RenderTexture. // The RenderTexture that can be obtained is temporary. Panorama180Render.PanoramaTextureData rt = (Panorama180Render.PanoramaTextureData)fc.Current; // Assign RenderTexture to Material. if (rt != null) { if (m_mat != null && rt.colorTexture != null) { if (m_mat.mainTexture == null) { // In the case of HDRP before Unity 2018, // even if RenderTexture is added to the mainTexture of Material, it will not be reflected. // Therefore, the texture is forcibly specified. #if !UNITY_2019_OR_NEWER m_mat.SetTexture("_UnlitColorMap", rt.colorTexture); // HDRP/Unlit m_mat.SetTexture("_BaseColorMap", rt.colorTexture); // HDRP/Lit #endif m_mat.mainTexture = rt.colorTexture; } } if (m_depthMat != null && rt.depthTexture != null) { if (m_depthMat.mainTexture == null) { #if !UNITY_2019_OR_NEWER m_depthMat.SetTexture("_UnlitColorMap", rt.depthTexture); // HDRP/Unlit m_depthMat.SetTexture("_BaseColorMap", rt.depthTexture); // HDRP/Lit #endif m_depthMat.mainTexture = rt.depthTexture; } } } }
このコルーチンでPanorama180 Renderからパノラマ展開されたカラーとDepthテクスチャを取得し、 指定のマテリアルのテクスチャとして反映します。
このとき、パノラマ展開用のカメラでキャプチャを行いパノラマ画像を生成するのを待つ処理を行っています。
また、パノラマ画像が生成された後にキャプチャ用のカメラを非表示にしてキャプチャ処理を停止します。

Panorama180 Renderのコンポーネントの取得に失敗している場合は、何もせずにコルーチンを終了させます。
if (m_panorama180Render == null) yield return null;
「Panorama180Render.GetRenderTextureCo()」が1回のキャプチャを行うコルーチンです。
「StartCoroutine(fc)」でコルーチンを呼びます。
var fc = m_panorama180Render.GetRenderTextureCo(); var curCoroutine = StartCoroutine(fc);
「yield return curCoroutine;」の指定でコルーチンの終了を待ちます。
パノラマ展開された画像は複数のカメラからのキャプチャから生成されるため、この処理は数フレームかかる場合があります。
yield return curCoroutine;
以下の処理で「Panorama180Render.PanoramaTextureData」の構造に、結果のRenderTextureを返します。
Panorama180Render.PanoramaTextureData rt = (Panorama180Render.PanoramaTextureData)fc.Current;
「rt.colorTexture」がカラーテクスチャ、「rt.depthTexture」がDepthテクスチャです。
ともにRenderTextureです。
RenderTextureが存在しない場合はnullが入ります。
これを個々のマテリアルのテクスチャに指定して、結果をシーン上のMeshに反映しています。
以上の「GetPanoramaRenderTextureCo」コルーチンを、指定のボタンが押されたときに以下のように呼んでいます。
StartCoroutine(GetPanoramaRenderTextureCo());
この呼び出しはメインスレッドで待つことはしません。非同期で結果のRenderTextureが返る点に注意するようにしてください。
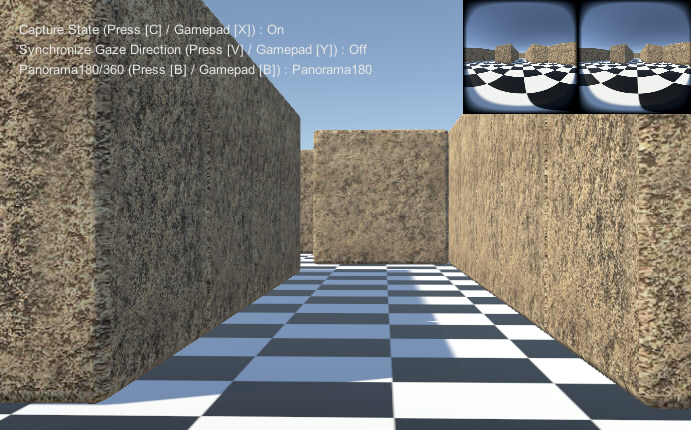
PC-VRでの動作も確認しました。
また、Oculus Quest2でのネイティブ実行でも動作することを確認しました。
ただし、「Panorama180Render.SetRenderTextureSize()」「Panorama180Render.SetOutputTextureSizeType()」「Panorama180Render.SetOutputTextureSizeType360()」でのテクスチャサイズの指定では、 解像度を上げすぎると時間がかかることになります。
負荷がかかる場合にVRでは一瞬止まることになり、その間カメラがぶれるのが見えてしまいます。

blocks_sync_RenderTextureSave

Unity EditorRuntimePC-VROculus Quest2(Native)
ooo-

概要

デモシーン「blocks_sync_RenderTexture」でのキャプチャ処理の後に、ファイルにパノラマテクスチャを保存します。

操作方法

キーボードの[A][S][D][W]またはゲームパッドのスティックで移動します。
キーボードの[C]またはゲームパッドの[X]ボタンを押すと、パノラマ180-3Dのキャプチャを表示します。
VRの場合は、Oculus Questの[X]ボタンを押すと、パノラマ180-3Dのキャプチャを表示します。
このとき、実行ファイルがある位置に"output.png"ファイルを出力します。

プログラムの説明

任意のGameObjectに"Panorama180Render/Demo/Scripts/Runtime/Sample_CaptureSyncRenderTextureSave.cs"のスクリプトを割り当てます。
コンポーネントからは[Scripts]-[Panorama180RenderSample]-[Sample_CaptureSyncRenderTextureSave]で追加します。

大部分は「blocks_sync_RenderTexture」のデモシーンと同じで、最後にファイル保存の処理を行っています。
using Panorama180Render = Panorama180Render.Panorama180Render; using Panorama180RenderFileUtil = Panorama180Render.PanoramaUtils.FileUtil; .... // Save file. RenderTexture colorTex = rt.colorTexture; if (colorTex != null) { // When using Unity Editor, the "output.png" file is output under the project directory. // At runtime after build, the "output.png" file is output in the same location as the executable file directory. m_saveRenderTexture(colorTex, "output.png"); } ... private void m_saveRenderTexture (RenderTexture rt, string filePathName) { if (rt == null) return; Panorama180RenderFileUtil.SaveRenderTextureToFile(rt, filePathName); }
「Panorama180Render.PanoramaUtils.FileUtil」の「SaveRenderTextureToFile」により、第一引数のRenderTextureを第二引数のファイルに保存しています。
この処理はメインスレッドで行われるため時間がかかります。

戻る